Filters and views can be used in different parts of Fortes Change Cloud. This article explains how you can work with filters and views!
This article answers the following questions:

What is a filter and what can I do with it?
Filters are used in different parts of Fortes Change Cloud to filter data. Data can be filtered based on different properties, for example the owner of an item, the date on which an item is created or the name of an item. Because of this filters can help create a clear overview of a planning or kanban board.
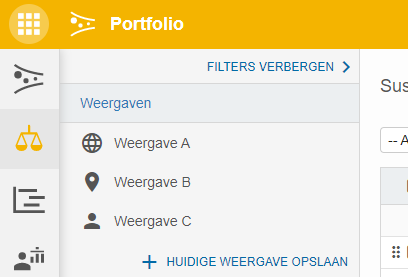
If you want to use the same filter or set of filters more than once, you can save the filter(s) as a view. A view can be used at the touch of a button. You can choose if a view can only be used by you (a personal view) or if it can be used by everyone who has access to the project or portfolio.
How do I set a filter?
- Click
FILTERS.
- Click on
ADD FILTER.
- Select the property (s) on which you want to filter the portfolio items and click
OK.
- Set the filters by filling in the necessary information.

- The filters are now in use.

How do I create a view?
- Open the filter panel by clicking
FILTERS. - Click
SAVE CURRENT VIEWin the filter panel.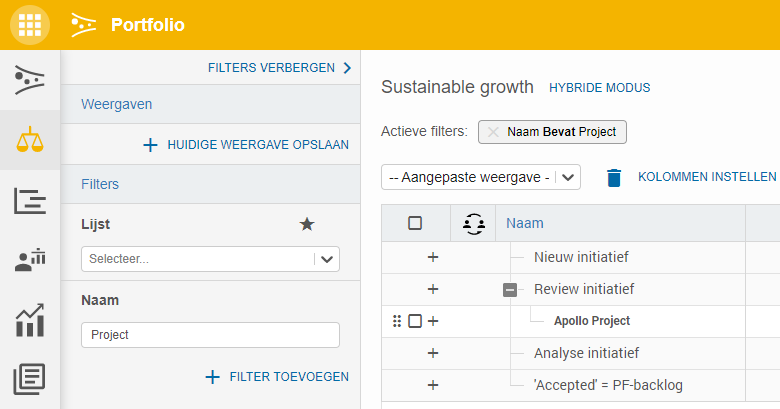
- Choose Overwrite existing view to overwrite an existing view by a new one or choose Add new view to create a new view. Fill in a name if needed and click
Save.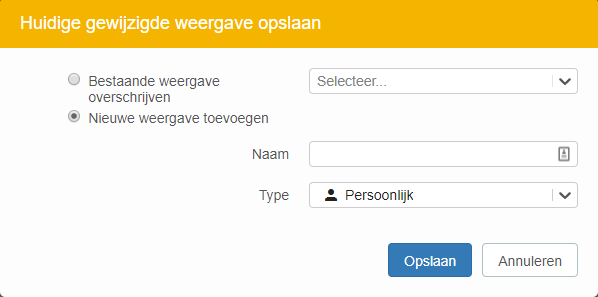
- Select a view in the view-menu to use it.