Use the project planning to display your project’s planning in a clear way. By making use of Gantt charts you are able to plan all phases and plan-items of your project in an orderly manner.
This article answers the following questions:
- What is a Gantt chart?
- What is the goal of the project planning?
- How do I get started using the project planning?
- How do I make sure there are no scheduling conflicts in my planning?
What is a Gantt chart?
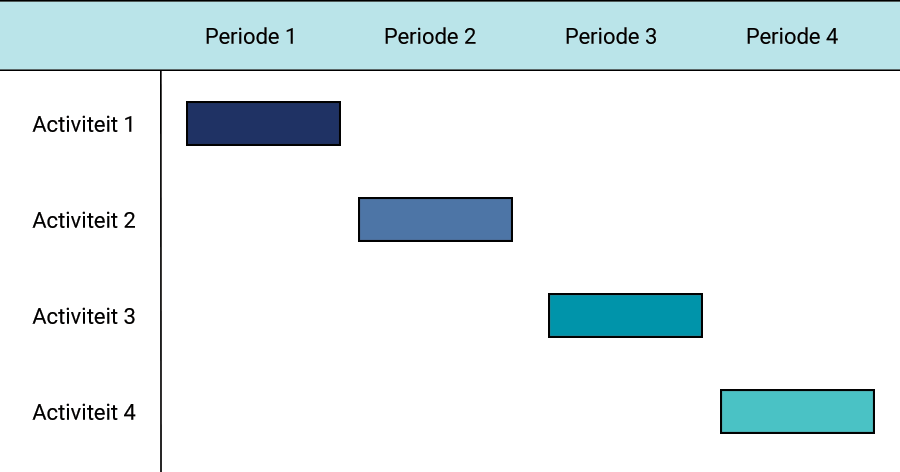
The project planning tab in the Project app works according to the Gantt principles. The items that are to be planned can be found on the y-axis while the x-axis displays a timeline. This enables plan items to be planned easily. One of a Gantt chart’s basic principles is that the first plan items to take place top the list, so the planning would follow a general direction from top-left to bottom-right.
What is the goal of the project planning?
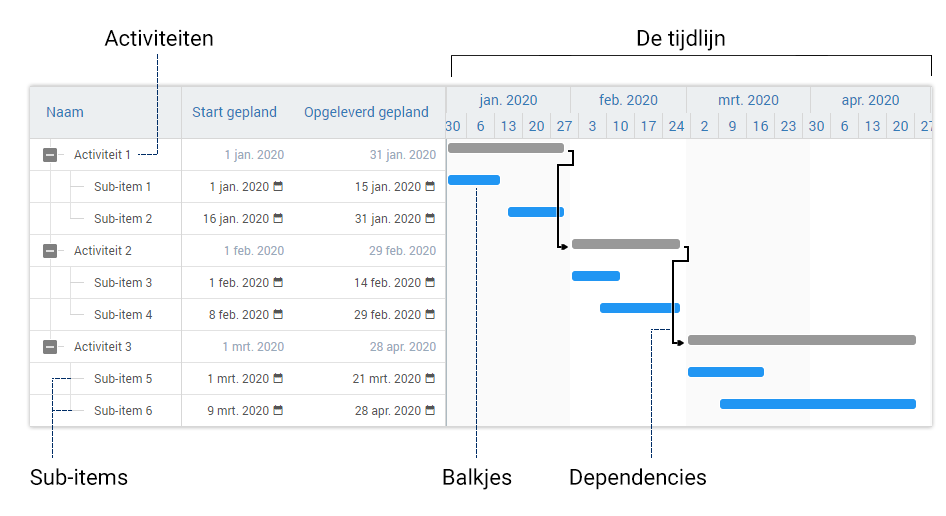
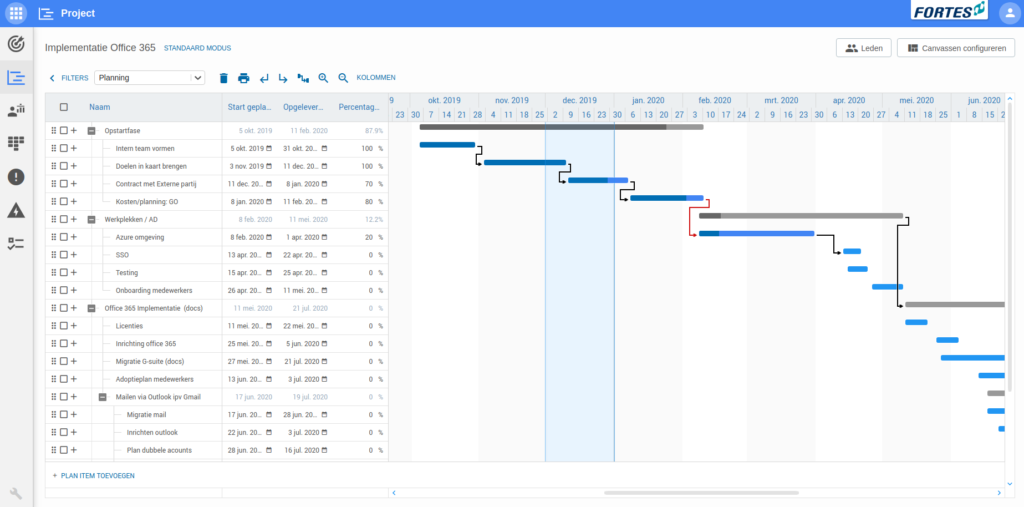
The project planning tab enables you to display a project’s planning in the form of a Gantt chart. By choosing a project model (when a project is created) a set of project-phases and -items are added to the planning. Next, new plan-items or phases can be added to the planning and all items can be planned by adding a bar to the planning. Dependencies between plan-items can be added as well. Ultimately, a clear and structured planning is created. This enables you to see the progress of a project at a glance and raises awareness of set deadlines.
How do I get started using the project planning?
- Check if the choses project model satisfies your needs by checking if all needed phases and items are included (left in the overview). Phases and items can be added later as well. Hint: use umbrella items (i.e. items with sub-items) to indicate a phase and use sub-items to indicate elements in the phase.
- Delete items by selecting one or more items and clicking the delete button.
- Add items by clicking
+left of an item. - Drag items up or down to change their order. You could opt to create a chronological planning, or to place the plan-items in order of priority.
- Plan items by dragging a bar in the right period, or changing the length and position of the existing bar in the planning. When you plan items, you will see that a bar for the umbrella item (phase) is automatically created. This bar includes all sub-items of the umbrella item and spans the total period of all sub-items.
- Add columns to the planning to get more insight in the progress of the project. You could, for example, add the start- and end date of a project-phase or plan-item, the percentage completed or the duration of an item.
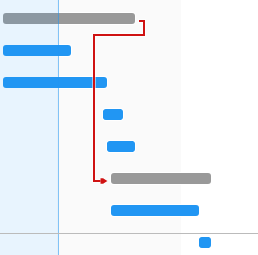
- Voeg afhankelijkheden toe aan de planning om aan te geven dat een gepland item pas kan beginnen na de afronding van een eerder gepland item. Dit doe je door te klikken en te slepen vanuit een gepland item naar een ander gepland item. Een afhankelijkheid is zichtbaar als een zwarte of rode pijl in de planning.
- Een rode afhankelijkheid geeft aan dat het tweede item begint voordat het eerste is afgerond. Verplaats de items zodat de afhankelijkheid zwart is of gebruik de afhankelijkheid-knop om de planning automatisch kloppend te maken.
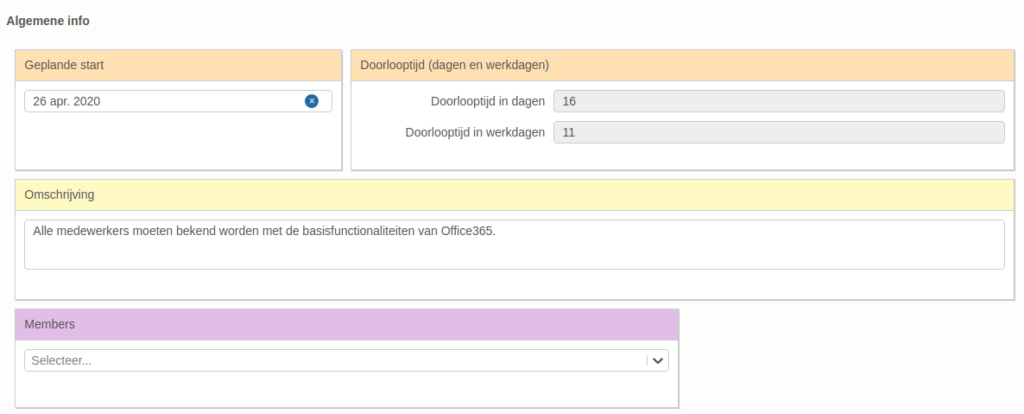
- Voeg taken toe aan de plan-items door te klikken op het pijltje rechts van een plan-item of projectfase en één of meerdere kaartjes toe te voegen aan de lijsten in dit overzicht. De lijsten in dit overzicht zijn de lijsten die ook te vinden zijn in de kanban tab. Alle taken die worden toegevoegd aan een lijst van een projectitem worden ook toegevoegd aan het kanban bord in de kanban tab.
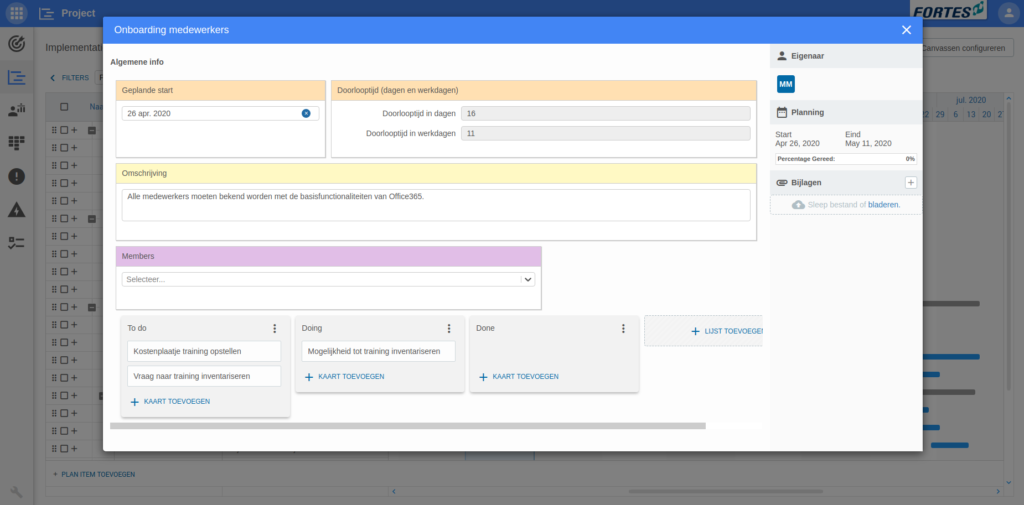

- Optionally add a canvas to the project items by clicking
Configure canvasses. Create a new canvas template by clicking+ ADD CANVAS TEMPLATEor add an existing canvas template as a configuration with+ ADD CANVAS CONFIGURATION.- A canvas displays additional information about a plan item when a plan item is clicked. For example, this is an easy way to view the status of a plan item. .
How do I make sure there are no scheduling conflicts in my planning?
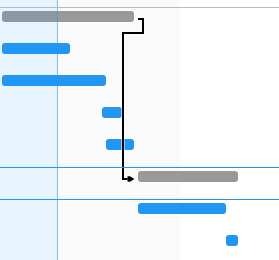
It is important there are no scheduling conflicts in the planning. A scheduling conflict is displayed with a red dependency; if a dependency is red the second items starts before the first one is finished. Move the items so the second item starts when the first is finished and the dependency is black or use the dependency button to fix the planning automatically.

