Classic reporting
Introduction
What is the tab?
The Classic reporting tab lets you build reports that show project data the way you want: using views, widgets, or timeline reports. On-screen reports can be filtered and customized; you can also download reports to Word or Excel.
Who uses it?
Project managers and PMO/portfolio admins who need flexible, ad-hoc reporting or a printable export. Different roles may create and share views, configure widgets, or generate timeline outputs. (View types determine visibility.)
What value does it deliver?
- One place to report on many project items (plan items, resources, risks, lessons learned, documents, entries, etc.).
- Save reusable views (columns + filters) and add widgets (e.g., charts).
- Export any on-screen report to Word/Excel for distribution.
What is the goal of the Classic reporting tab?
Fortes Change Cloud offers two kinds of reports:
- On-screen reports aided by views and widgets. You arrange columns and filters as needed; the combination can be saved as a view. You can also create your own graphs.
- Automatic reports generated in Word or Excel (see the Quick Guides for more on automatic reports).
All on-screen reports can be downloaded to Word or Excel.
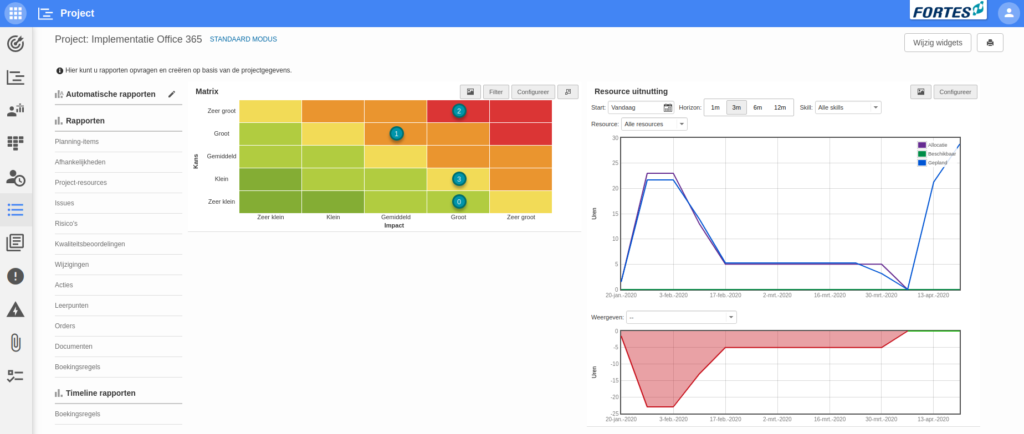
How do I create a classic report?
You can build a report in three ways:
- Use a view: Click the item you want to report on (under Reports) and select the view in the pop-up.
- Use a widget: Click Edit Widgets, add the widget(s), then configure each widget so it shows the correct information (e.g., a graph of planned vs. allocated hours).
- Create a timeline report: Build a time-phased overview from entries (see section below).
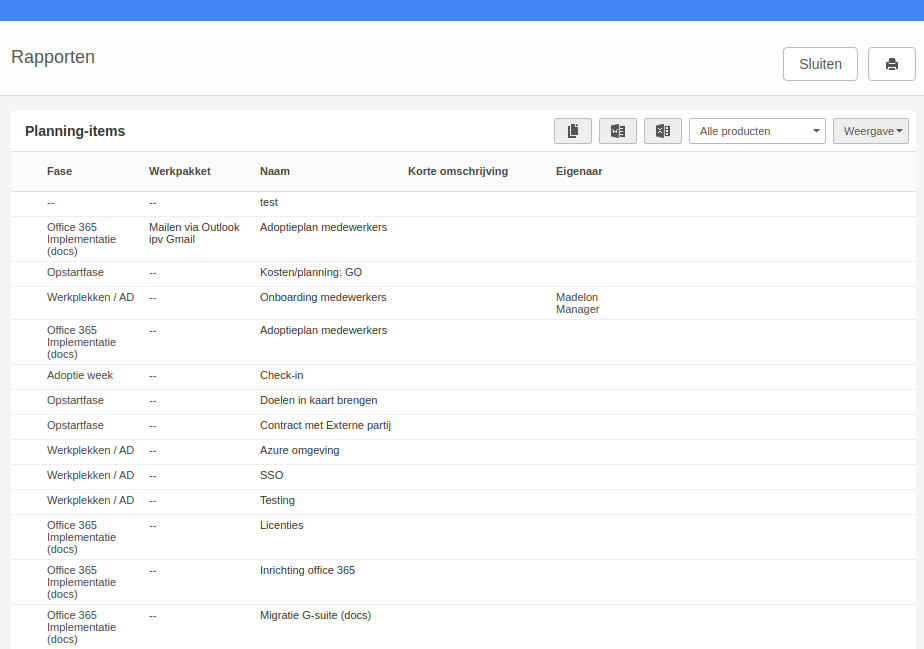
How do I create a view?
- Choose columns: Click View → Choose Columns. Select columns, change order, choose sorting/ranking and number of lines. The result appears as a custom view.
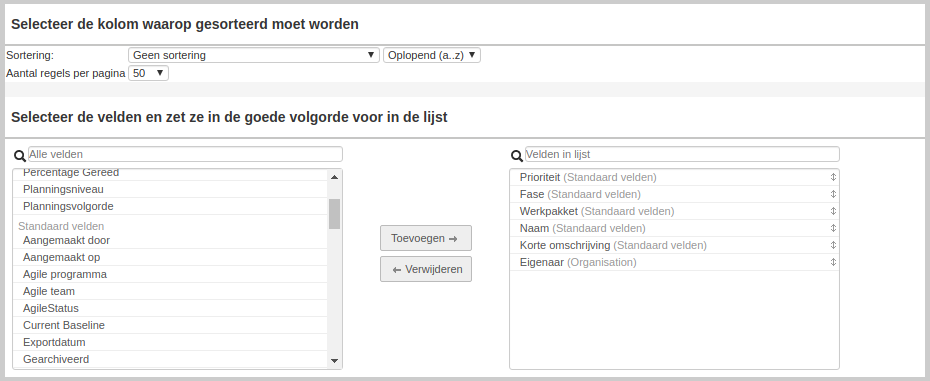
- Filter the data: Click View → Set Filter. Pick a field, set the condition, Add filter, then OK to apply.
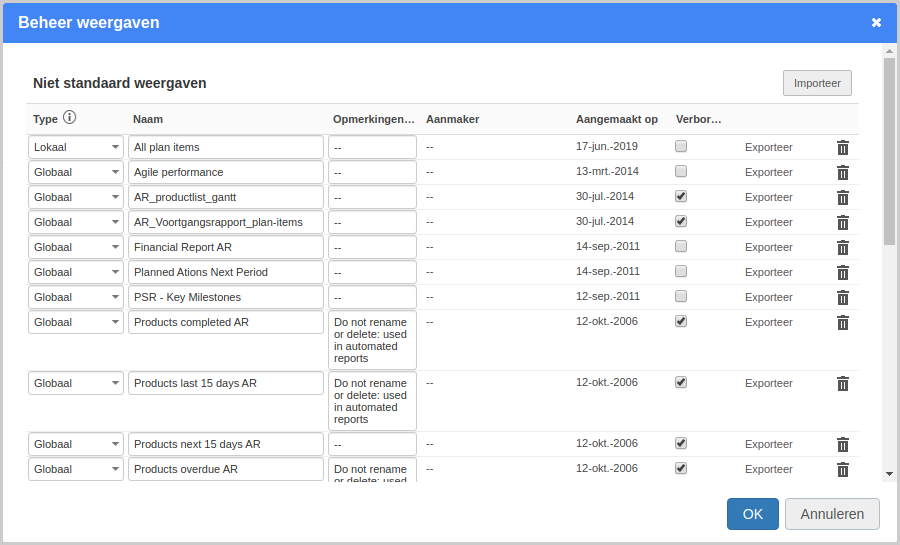
- Save the view: Click View → Save View. Set name and type:
- Personal: visible only to the creator (everywhere).
- Local: visible to everyone but only at this location.
- Global: visible to everyone everywhere (admins only).
- Manage views: Click View → Manage Views to rename, change type, add remarks, hide or remove views.
What is a timeline report?
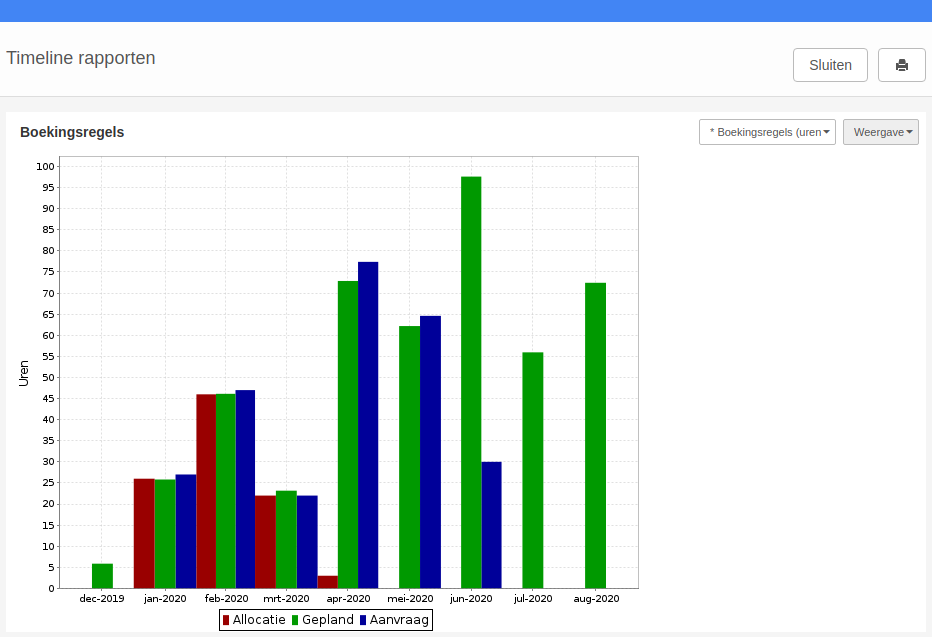
Under Timeline reports, you can create a timeline report from entries. Timeline views are built differently than normal views because they sum entries per configurable time period.
How do I work with a timeline view?
- Open the pop-up with timeline reports by clicking Entries under Timeline reports.
- Click View → Basic settings and choose: unit (hours or money), scale, start date, horizon, whether to show a graph or table, and which fields to display. Click OK to apply and review the result.
Best practices
- Name views clearly (what + filter scope), and use Local for team sharing; reserve Global for admin-maintained standards.
- Keep columns lean; add only what answers the report question.
- For KPIs/visuals, prefer widgets on the tab; for tabular extracts, use views + Word/Excel export.
- For time-phased analysis of entries, use a timeline report and set unit/scale/horizon to match your audience.
FAQ
Can I export these reports?
Yes. All on-screen reports on this tab can be downloaded to Word or Excel.
What’s the difference between on-screen and automatic reports?
On-screen reports are built with views/widgets and can be exported; automatic reports are generated in Word or Excel using predefined templates (see Quick Guides).
Who can see my view?
Depends on the view type: Personal (only you), Local (everyone at this location), Global (everyone everywhere, admins only).
Why use a timeline report?
To summarize entries over time with a configurable period, unit, scale, start date, and horizon, and show them as a graph or table.
Need more support?
Contact your Fortes Change Cloud administrator or consult the online knowledge base for more step-by-step configuration guides.