Risks
Introduction
What is the tab?
The Risks tab lets you record and manage all project risks in one place. You decide per project which information to store and show.
Who uses it?
Project managers and team members who register and update risks. Portfolio managers can request reports about key risks.
What value does it deliver?
A single list with the columns you choose, quick filtering, reusable views, and the ability to export or print the list for stakeholders without project access.
What is the goal of the Risks tab?
The Risks tab makes it easy to keep track of project risks and to decide which details you want to register. Typical fields include status, probability (chance), impact, owner, and created date. You can export the list to a spreadsheet or print it to share with people who don’t have access to the project.
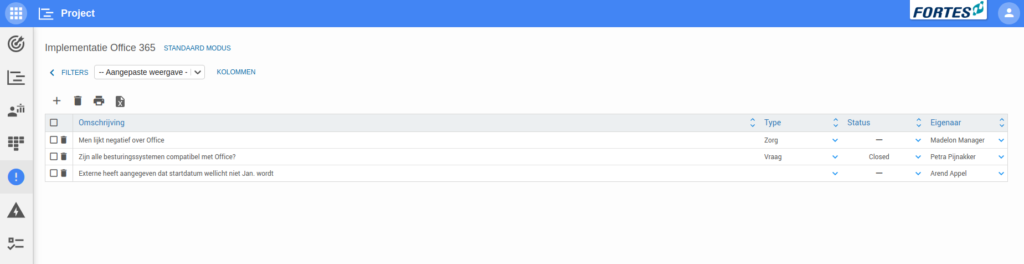
How do I use the Risks tab?
-
Choose which information to show and add it as columns. Click COLUMNS and select the columns you need.
Examples:- Status — whether a risk is solved or not.
- Chance — the probability that the risk occurs.
- Impact — the effect if the risk occurs.
- Owner — the person responsible for the risk.
- Last edited on — shows when the risk was last updated.
-
Add a risk with +, enter a description, and fill the remaining columns.
-
Use a filter when the list grows and you need focus (e.g., highest probability). Save a view if you want to reuse a filter or set of filters.
-
Export the risks to a spreadsheet to share them outside the project, or print the list.
Customize the issue detail page (log item detail)
You can configure the detail page of log items (issues, risks, quality reviews, changes, learning points) to fit your needs.
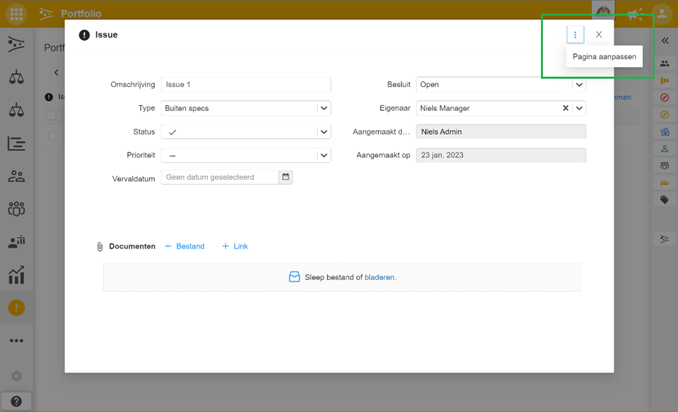
- Open a log item’s detail page and use the menu button Adjust Page to enter the canvas configuration mode.
- This feature is available to administrator, manager, and support roles.
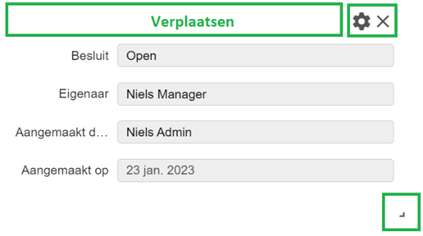
- Use the segment settings button to adjust a segment, the x to remove it, and + add segment at the bottom to add a new one.
- Reorder segments by dragging the header; resize with the corner handle.
- Click Reset to Default to restore the default layout.
Segment types you can add
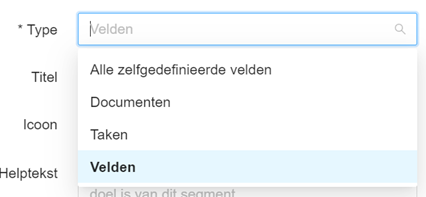
- Fields — select your own fields (this segment type can be added multiple times).
- All self-defined fields — shows all custom fields of the log item.
- Tasks — add tasks to the log item.
- Documents — add documents to the log item.
Where does a custom layout apply?
- You can set up a custom detail page per log item type in a project; that layout is available only in that project.
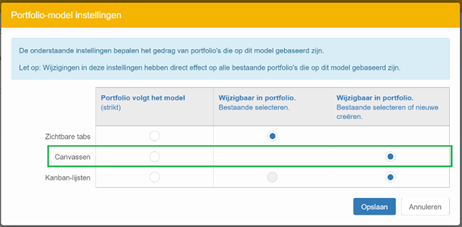
- To roll out custom detail pages across multiple or all projects, configure them in project models.
- In a model, you can choose to enforce the model strictly or allow projects to deviate from it.
Best practices
- Keep the column set short and relevant; add only what you really track.
- Use filters to focus on high-probability or high-impact risks; save views you’ll reuse.
- Record an Owner for each risk so responsibility is clear.
- Use Export (or print) to share the register with stakeholders who don’t have project access.
FAQ
Where do I choose which fields are visible?
Open COLUMNS on the Risks tab and select the columns you need.
How do I add a new risk?
Click +, give it a clear description, and fill the relevant columns (owner, chance, impact, status).
How do I focus on the most important risks?
Apply a filter (e.g., highest chance), and save it as a view if you want to reuse it.
How do I share the risks with people who don’t have project access?
Use Export to a spreadsheet or print the list.
Can the portfolio ask me to report risks?
Yes—portfolio managers can request reports about key risks; you then update the risks and share the result.
Need more support?
Contact your Fortes Change Cloud administrator or consult the online knowledge base for more step-by-step configuration guides.
TODO: translate this document (user-docs/projects/risks.md).
Source: C:\Users\MilanOzinga\Development\fcc\knowledge-base\docs\user-docs\project\risks.md