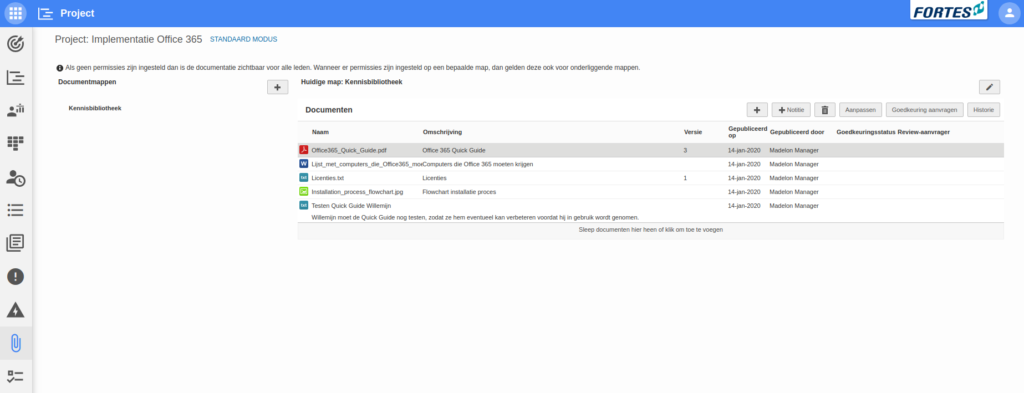
The documents tab of the Project app enables you to store and update documents related to a project. This way, everyone who has access to the project can see these document and can access them when needed.
This article answers the following questions:
What is the goal of the documents tab?
The document tab can contain all documents relevant to a project. It is easy to structure the documents by creating different folders. In addition, Fortes Change Cloud keeps track of the history of each document, so you can check previous versions at any moment. Furthermore, it is possible to ask for approval for the documents belonging to a project, such that others have to do a revision of the document(s).
How do I use the documents tab?
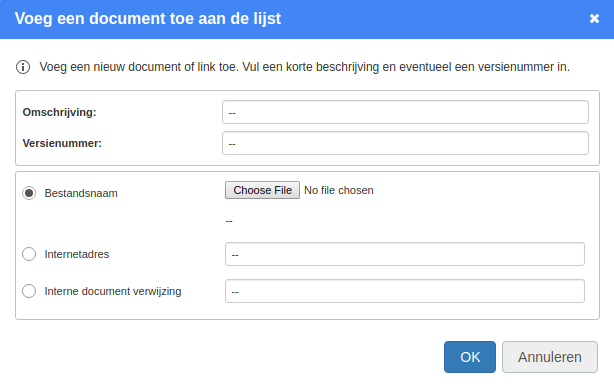
- Add a document to the current folder by clicking
+. Add a document by uploading it or by filling in a url to an online file. Also fill in a description and a version number.
- Add a note to the list of documents by clicking
+ Note. You could use a note to, for example, add important information about a project or to add an annotation. - Create more folders if desired by clicking
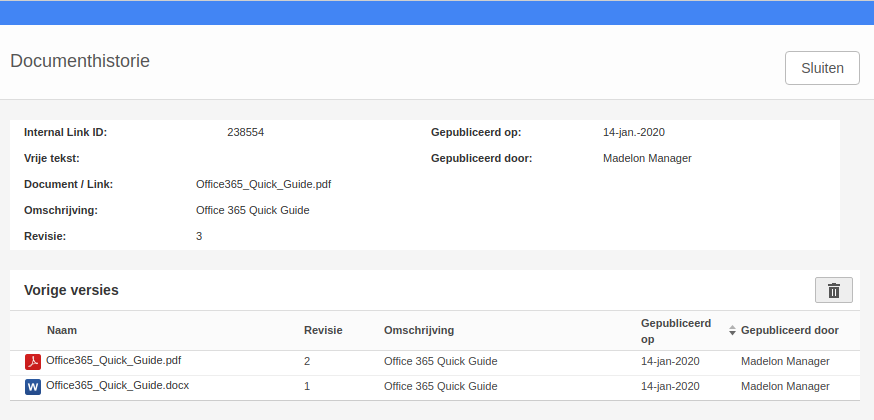
+next to the header document folders. Fill in a name and clickOK. It is now possible to place documents in this folder. If there are many documents needed for a project, it could be wise to use multiple folders. - Check the history of a document by selecting a document and clicking History. Here you can see the previous versions of this document that were uploaded to Fortes Change Cloud.
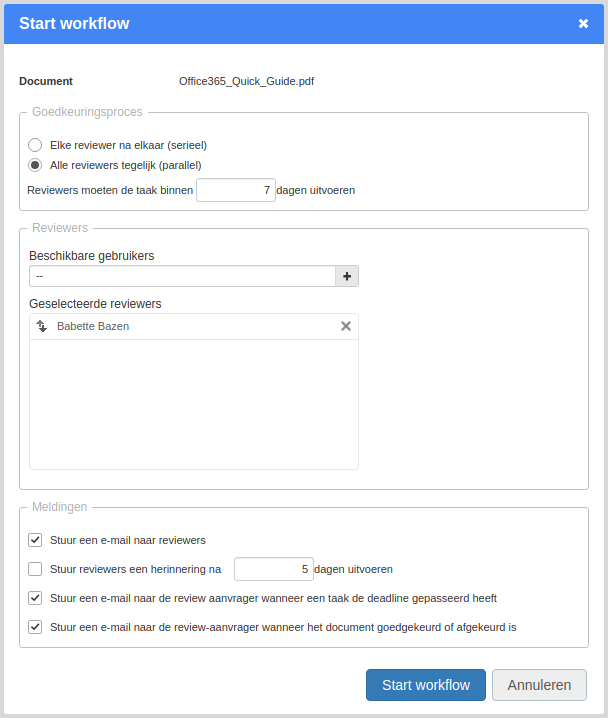
- Request approval for a document by selecting a document and clicking
Request approval. You can select who gets to approve the document(s) and what their deadline is.